Databricks notebooks
Please be aware that the Databricks platform is regularly updated and may look different from the guidance included on this site. If you notice any discrepancies between the content on this site and the Databricks platform, please let us know by contacting statistics.development@education.gov.uk.
Overview
We recommend using the default .ipynb format for full retention of images and formatting included within the notebook. Notebooks can be saved as raw source files as .R or .SQL, but markdown chunks are saved as comments, which loses some of the formatting and any images you’ve included within the notebook for documentation.
Notebooks are a special kind of script that Databricks supports. They consist of code blocks and markdown blocks which can contain formatted text, links and images. Due to the ability to combine markdown with code they are very well suited to creating and documenting data pipelines, such as creating a core dataset that underpins your other products. They are particularly powerful when parameterised and used in conjuction with Workflows.
You can create a notebook in your workspace, either in a folder or a repository. To do this locate the folder / repository you want to create the notebook in then click the ‘Create’ button and select Notebook.
Notebooks can be helpful for ad hoc, exploratory, or one off pieces of analysis to add additional documentation as you go. You can also use notebooks to present findings to others by hiding code cells and only showing Markdown cells containing charts, tables, images or text. They can be exported as HTML files to enable easier sharing outside of the Databricks interface.
If the rest of your team are unfamiliar with notebooks and will need to pick up your work at a later date, use of notebooks without proper handover or documentation could cause issues and result in work no longer being reproducible. The Statistics Development Team are happy to advise on this and provide guidance if you have any concerns.
When to use notebooks
For regular analysis pipelines and models adopting RAP principles we’d usually advise against using notebooks and instead recommend a Git controlled repository of code scripts using the standard repository template available in dfeR.
We recommend this because in addition to notebooks being different to how many teams write code now, version control, collaboration and reproducibility can all be more difficult in Databricks notebooks. If you would like to use notebooks for analysis, they must be used in conjunction with an Azure DevOps or GitHub repository. If you share a notebook with edit permissions, it is possible for your code run to be accidentally cancelled if another user starts running code in the same notebook. Your code can also be overwritten by other users, and it can be difficult to recover previous versions.
When you have a full script in an IDE, the script will provide the same output consistently. However, with notebooks you can run code cells independently of one another. You must ensure that you run all code cells in the correct sequential order. If you do not run all code cells in order then your output could be inconsistent and result in errors, potentially making QA more difficult. This introduces more manual steps and increases the risk of human error.
When using Databricks notebooks with Git, cell outputs are automatically cleared by default when your code is pushed up to a repository. However, if you share a notebook using the Databricks interface, cell outputs remain intact from the last time you ran the code. This risks sharing data that should not be shared with others. Before sharing code with someone outside your team, you must use the Clear all cell outputs option in the Databricks “Run” menu to avoid inadvertently sharing data that only you and your team should have access to.
Differences between IDEs and notebooks
The table below, taken from NHS-R guidance, shows a comparison of the features of notebooks and IDEs to help you decide where each would be most appropriately used:
| Feature | Notebooks | IDEs |
|---|---|---|
| Interactive outputs (tables, plots, etc) | Yes | No* |
| Storytelling and sharing results | Yes | No |
| Benefits out-of-the-box (minimal configuration) | Yes | No |
| Deterministic outputs (i.e. same result every run) | No | Yes |
| Supports modular code structure & packages | No | Yes |
| Supports unit testing frameworks | No | Yes |
| Nice version control (e.g. readable Git diffs) | No | Yes |
| Autocomplete / auto-formatting & syntax highlighting | Yes** | Yes |
| Compatible with sharing code externally | Yes*** | Yes |
* whilst you can still make and preview tables and plots in RStudio and other IDEs, they’re not interactive in the same way as those in notebooks
** auto-formatting is available for SQL and Python in Databricks, but not R
*** external users must have software that would allow them to open notebooks
You can read more about the differences between IDEs and notebooks and where each might be useful on the NHS-R website.
Any notebooks used for core business processes should be created in a repository linked to GitHub / DevOps where they can be version controlled.
Using notebooks
Once you’ve created a notebook it will automatically be opened. Any changes you made are saved in real time so the notebook will always keep the latest version of its contents. In order to ‘save’ a snapshot of your work it is recommended to use Git commits.
You can change the title from ‘Untitled Notebook <timestamp>’ (1), and set its default language in the drop down immediately to the right of the notebook title (2).
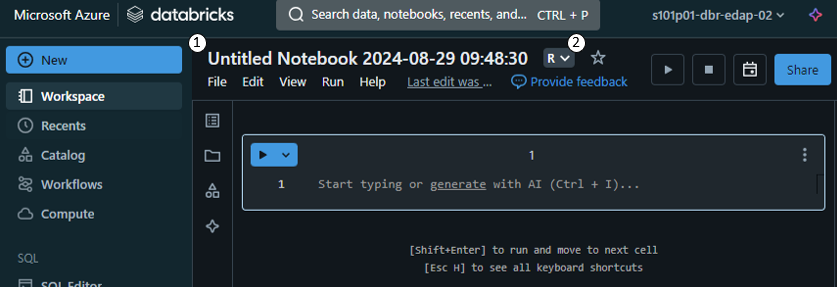
The default language is the language the notebook will assume all code chunks are written in. In the screenshot above the default language is ‘R’, so all chunks will be assumed to be written in R unless otherwise specified.
You can also add markdown cells to add text, links and graphics to your notebook in order to document the processing done within it.
To add a new code of markdown chunk move the mouse above or below another chunk and the buttons ‘+Code’ and ‘+Text’ will appear.
To run code chunks you’ll first need to attach your compute resource to it by clicking the ‘Connect’ button in the top right hand side of the page.

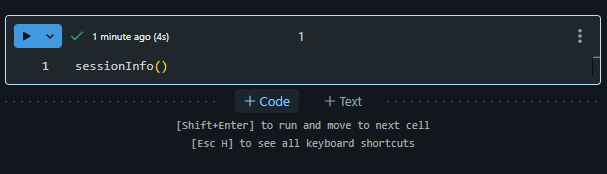
You can run a code chunk either by pressing the play button in the top left corner of the chunk, or by pressing Ctrl + Return/Enter on the keyboard. Any outputs that result from the code will be displayed underneath the chunk.
If you try to View() a data frame in R you’ll notice that the function doesn’t work within Databricks. Instead Databricks providers the display() function for R users to view their data with.

Everything ran in a notebook is in it’s own ‘session’ meaning that later chunks have access to variables, functions, etc. that were defined above. Chunks can be ran manually, however doing this runs the risk of running code out of order and may consequently produce unexpected results. To avoid this all chunks can be ran in order from the beginning of the Notebook using the ‘Run all’ button at the top of the page, alternatively you can ‘Run all above’ or ‘Run all below’ from any code chunk.
Notebooks cannot share a session with another Notebook so bear this in mind when constructing your workflows. If you need to pass data between notebooks it can be written out to a table in the unity catalog using SQL / R / Python / Scala as you would write to a SQL table in SQL Server. This can then be accessed from later notebooks.
Notebooks can be parameterised using ‘widgets’, meaning a single notebook can be re-used with different inputs. This means they can be used in a similar way to a function in R/Python or a stored procedure in SQL.
A coding best-practice is to build components that can be re-used to perform many similar tasks rather than writing repetitive code.
This applies equally to notebooks or scripts you create within Databricks which can be made re-usable through parameters. To reference a parameter within a notebook you can use the syntax :parameter_name from Databricks Runtime 15+. In previous DBR versions the syntax was ${parameter_name}.