Making more branches
This section will guide you through how to create more branches, taking the main branch you created as a base.
When you create a Git project, it will automatically create a “main” (sometimes “master”) branch for you. This is where the code that has been quality assured and you are happy with should sit.
It is good practice to create a branch whenever you have a change to make to your work. Having two branches means that if anything goes wrong in the “development branch”, the “main” branch is still unaffected and runs without issue. This lets you test and quality assure the code more thoroughly before merging into your main branch, whilst anyone coming to the repo will know that whatever is on the main is the latest “production” version.
Chose one method below to create your new branch, which we will call “development”. Then follow the instructions at the bottom of this page to update your logbook.
Ensure that you’re on your own personal main branch that you created in making a branch, i.e. <github_username>/main.
Create a new branch ready to make changes:
git checkout -b <github_username>/developmentThe branchname in brackets should now show the name of your new branch, which means any changes you commit now will be applied to this branch and not your previous branch.
As before, you can sync this new branch to the remote repository by pushing:
git push -u origin <github_username>/developmentEnsure you are on your personal main branch.
In the Git panel, click the purple new branch symbol
 as to the left of the username in the screenshot below.
Then enter your development branch name as
<github_username>/development(but replacingwith your own GitHub username, e.g. jsmith/development)

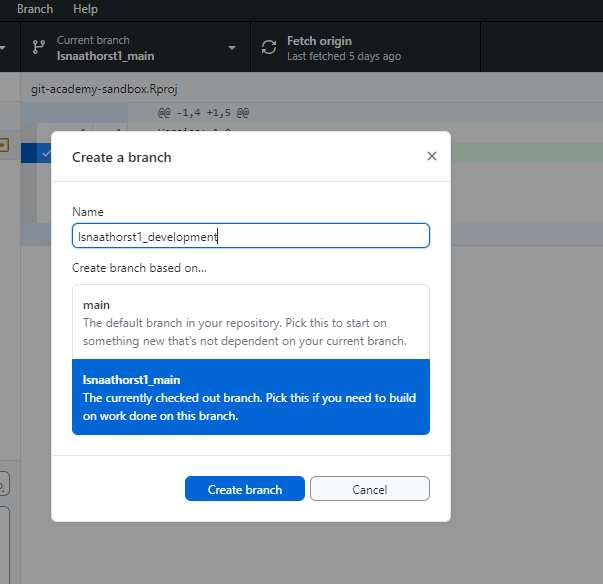
Click Branch in the menu bar and then select New branch… as shown in the screenshot below.
Then enter your branch name as
<github_username>/development(but replacingwith your own GitHub username, e.g. jsmith/main)
The current branch
(<github_username>/main)should be listed in the very bottom left hand corner of the VS Code window frame. If you left click on this, you should then see a menu appear at the top of the VS Code window with some branch options (as shown in the screen shot below).Click + Create new branch… and then enter your branch name as
<github_username>/development(but replacingwith your own GitHub username, e.g. jsmith/development).You should now see the branch name listed in the bottom left of the window frame shown as the branch you just created, meaning any changes you currently make will be applied to that new development branch (and not the main branch, or your personal main branch).
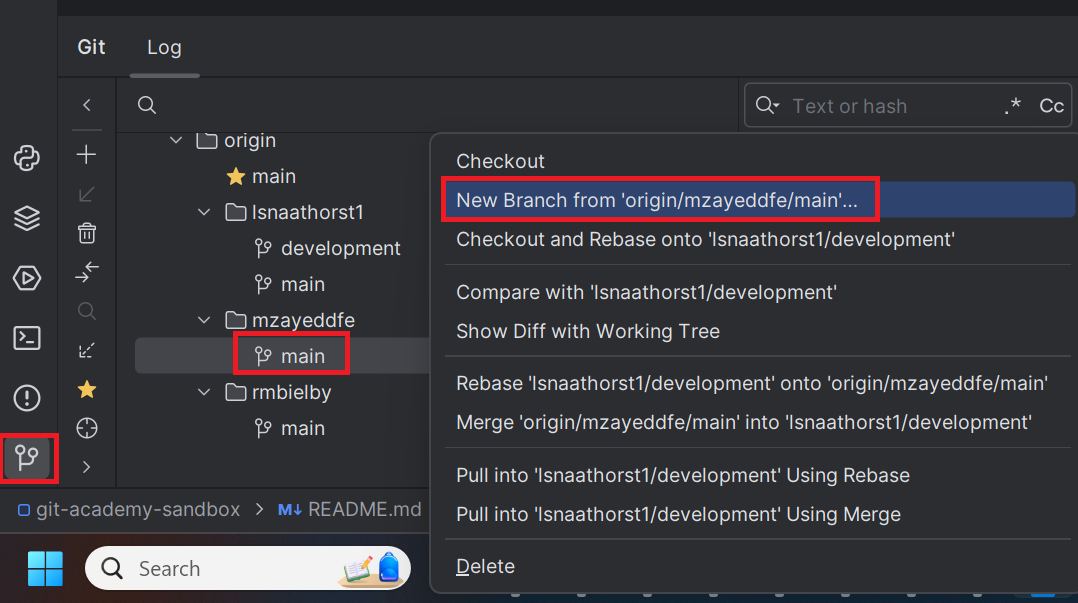
Open up the Git panel in PyCharm and you should see something like the screenshot below. Right click on your
<github_username>/mainbranch and select New branch from ‘<github_username>/main’….Then enter your branch name as
<github_username>/development(but replacingwith your own GitHub username, e.g. jsmith/development).
Now you have made your development branch, go to your git log and tick the boxes under ‘Making more branches’, before adding, committing and pushing the changes.