Syncing to the remote (push)
This section will guide you through syncing your local repo to the remote one, also known as pushing.
Any change made so far is only being applied to the local copy of the repository (i.e. the copy on your laptop). To apply your changes to the remote repository (i.e. on GitHub or Azure DevOps), you need to “push” the changes.
Having recorded your changes, follow the instructions below to push to the remote.
The first time you update your remote repo with the changes you committed to your local one (aka push the changes), use the command below:
git push --set-upstream origin <github_username>/main
After that, if you want to push changes you committed in the same branch use the following command:
git push
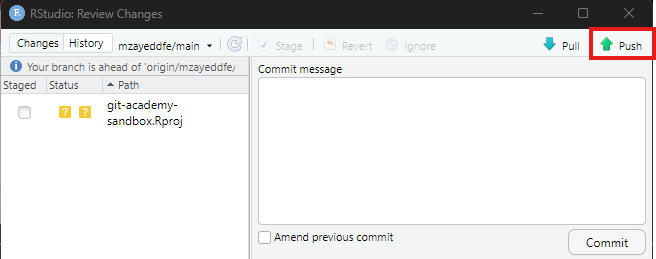
Click the green upwards arrow to push your changes to the remote repo. You can do this from the commit window as shown in the image below.
Alternative method
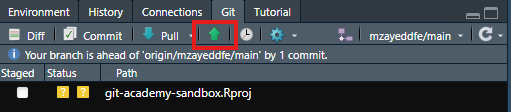
You can also do this from the side panel after closing the commit window as shown in the image below.
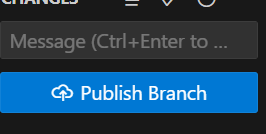
- To sync your changes, all you need to do is click the bluebutton saying ‘Publish Branch’ after commiting your changes.
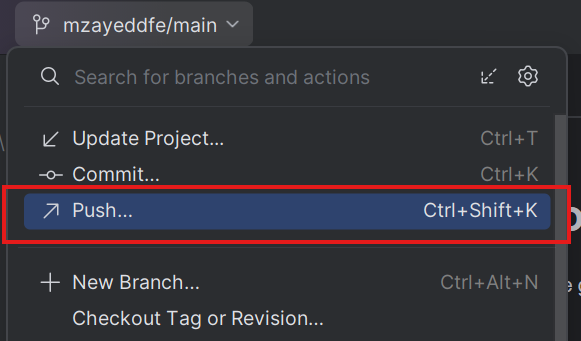
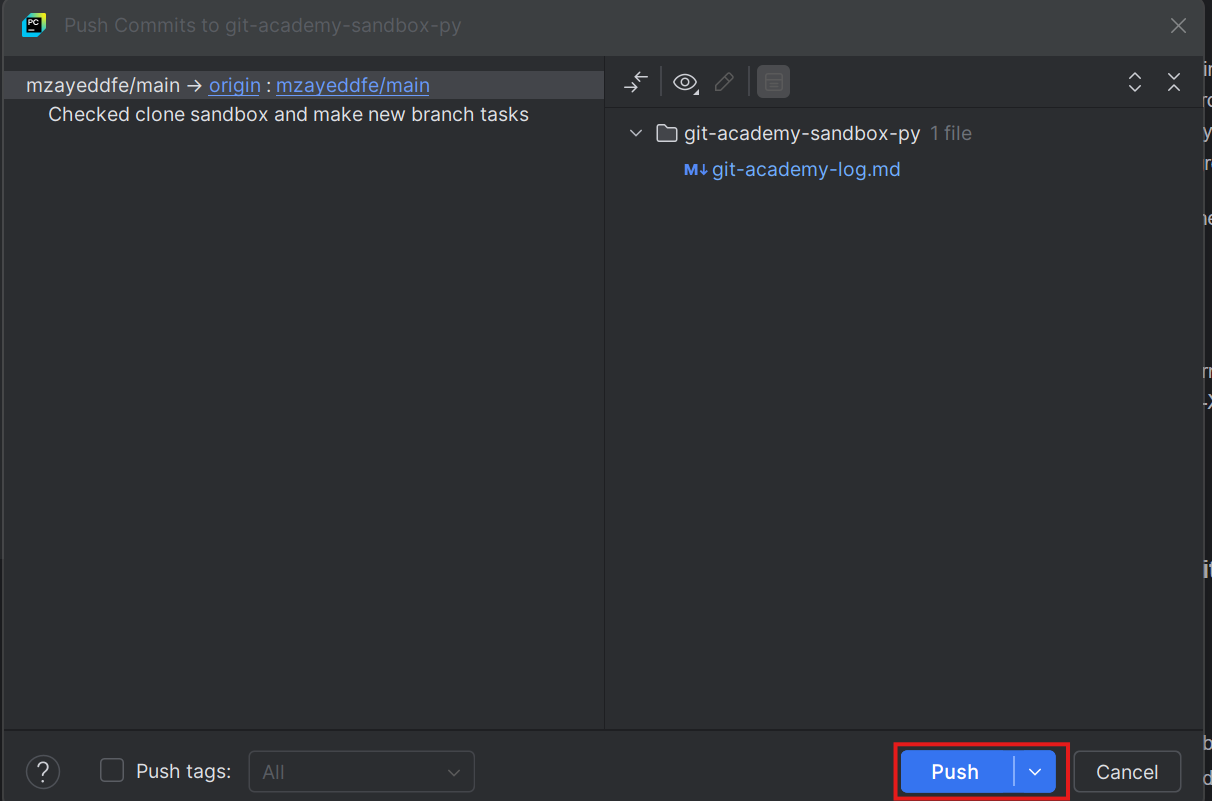
Click on the branches drop down menu at the top of the screen and click “Push”.
A screen will pop up with your previous committed changes.
Click “Push”.
Alternative method
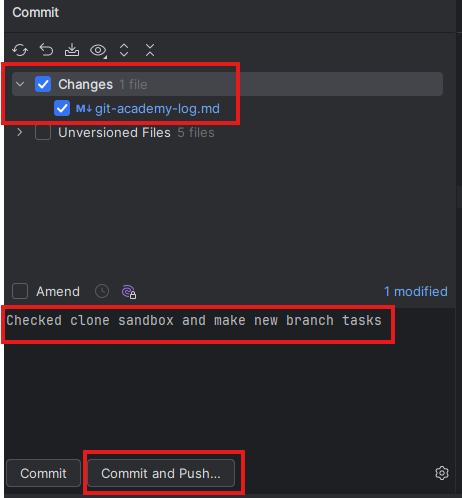
Alternatively you can push and commit your changes at the same time from the commit window by clicking “Commit and Push” after you write your commit message.
Remember to fill in your logbook now that you have completed these steps. You should open the file and tick off the tasks you have completed under the header “Recording changes (add and commit)” and “Syncing to the remote (push), before then adding, committing and pushing the changes.