Making a new branch
In a Git repository, different versions of work are controlled by using what are called “branches”. Edits can be made to files on a branch and those will not effect files on any other branch.
Most repositories will have a “main” branch. This is considered the central working (production) version of your work. When editing work, we generally don’t make edits directly on the main branch. Instead we create specific branches for specific chunks of work.
Having cloned the git-academy-sandbox repository, now make a new branch to work in.
Replace <github_username> in the below with your GitHub username to make your own personal main branch in the sandbox repository.
git checkout -b <github_username>/mainIf you run git log now, you’ll see that the latest commit is labelled something along the lines of HEAD -> <github_username>/main, ..., main. This means that the active (or “head”) state of the repo is set to being your new branch (which is currently identifical to the main branch that you just branched from).
In the Git panel, click the purple new branch symbol  as circled in the screenshot below.
Then enter your branch name as <github_username>/main (but replacing jsmith/main)

We recommend making sure the Sync branch with remote checkbox is ticked as this will make sure the branch is also created on your remote (i.e. GitHub / Azure DevOps). Not clicking this when making a new branch will cause the push / pull arrow buttons in RStudio to be greyed out.
Click Branch in the menu bar and then select New branch… as shown in the screenshot below.
Then enter your branch name as <github_username>/main (but replacing jsmith/main)

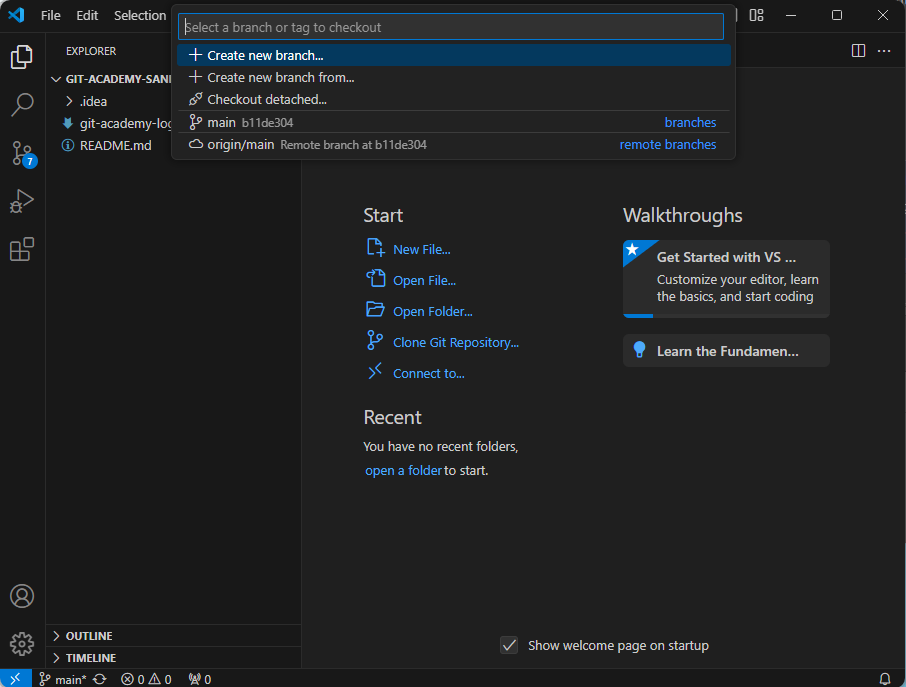
The current branch (main) should be listed in the very bottom left hand corner of the VS Code window frame. If you left click on this, you should then see a menu appear at the top of the VS Code window with some branch options (as shown in the screen shot below).
Click + Create new branch… and then enter your branch name as <github_username>/main (but replacing jsmith/main).
You should now see the branch name listed in the bottom left of the window frame shown as the branch you just created, meaning any changes you currently make will be applied to that new branch (and not main).
Open up the Git panel in PyCharm and you should see something like the screenshot below. Right click on main and select New branch from ‘origin/main’….
Then enter your branch name as
<github_username>/main(but replacingwith your own GitHub username, e.g. jsmith/main).
