Recording changes (add and commit)
This section will guide you through recording changes you make to your repo through the process of adding and committing files.
These steps help you manage and track changes in your project, making collaboration and version control efficient and reliable.
Having created your own branch, you should now record this change in the logbook provided in the git-academy-sandbox repository. This will mean you have recorded your progress so far, and made a change to a file which you can then practice recording. Follow the instructions below to make and record changes in your repo.
Open your
git-academy-log.mdfile. You can do this either in the file explorer pane of the software you are using, or by double clicking on the file in the folder you have saved it in locally.Put an x inside the brackets for the “Clone git-academy-sandbox” and “Create a new branch (<github_username>/main)”.
Save the file.
Stage the changes you want to commit by using one of the commands below.
To add changes to one file at a time:
git add git-academy-log.md
OR
To add all changes:
git add .
Commit changes with a message by entering:
git commit -m "Checked clone sandbox and make new branch tasks"
At any point in the above steps, you can use the command git status to check on the status of any files with un-committed changes in your repository.
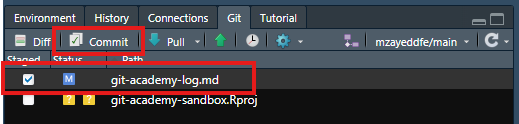
- In the Git panel of RStudio (see image below), tick the files you want to record the changes for.
- Click the commit button. It has a tick mark on two sheets of paper.
Write a short message to describe the changes you made.
Click “Commit”.
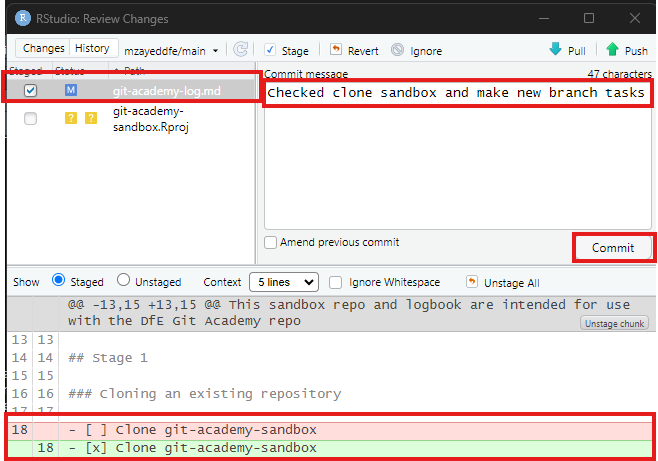
Note that you can see the changes made by comparing the green (current version) and the red (old version) highlighted sections.
- In the Source Control panel of VSCode, click the plus on the file to ‘stage’ it. (see image below.) Then write in your message above the big blue commit button, then click commit when you are ready.
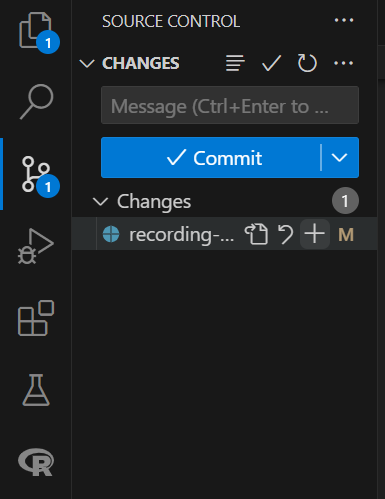
You can view what has been added in green and what has been removed in red. (also shown with + and -)
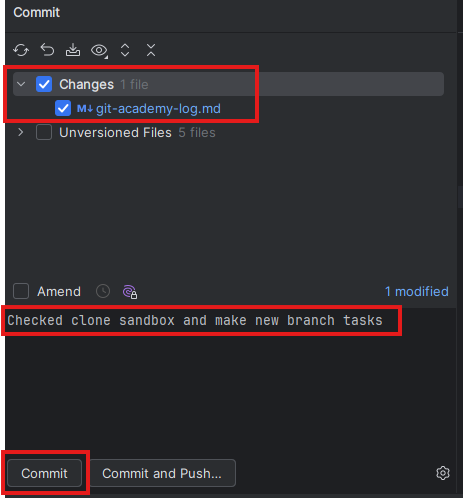
- Click on the branches drop down menu at the top of the screen and click “Commit”.
OR
- Click on the symbol that shows a circle flanked by two lines in the sidebar as shown in the image below.
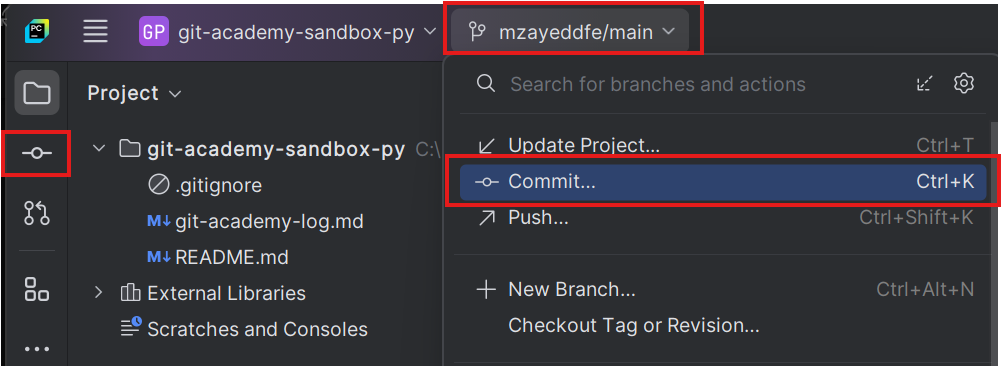
In the “Commit” pop up window, tick the files you wish to record changes for if they’re not already ticked.
Write a short message to describe the changes you made.
Click “Commit”.